Last year Vue surprised us with a new version that introduced some new concepts. The latest release was this summer, called “Quintessential Quintuplets” – based on an anime and manga series. As for React, the most recent version 17.0.2 was released this spring. You can tell these fellas are serious in their mission to help the web look and feel good.
If you are reading this, it means that you want to know how to set it up on your machine. Don’t worry, we covered all 3 environments! Therefore, in this blog, you will learn how to set up React and Vue.js on a Windows/Linux/macOS environment.
Without further ado, let’s jump into handling Node and Node Package Manager – since we will be needing it.
Note: We strongly recommend using a Node version manager such as nvm when installing Node and npm as it sets up configuration options to allow us to switch between different node versions on the same system.

MacOS and Linux
To install nvm ( node version manager ), we should run the following command
Once the installation is complete, to check if nvm is installed correctly, execute the following command
In case you get an error saying nvm: command not found, the following command should solve the problem for you :
On macOS
On Linux
Using nvm, we will install the latest node version along with npm with the following command
Once that is done, to make sure that everything is installed properly, we should check for node and npm versions
We are now ready to start our development journey!
Windows
On Windows, we will use a package called nvm-windows which is similar to nvm used on Linux and macOS.
Let’s download a setup from the nvm-windows repository from this link
Once downloaded and extracted, double click on nvm-setup.exe to start installing nvm
On the next screen, you can select the nvm installation path

Going further you may choose the location of symlink which nvm will use to set the current node version
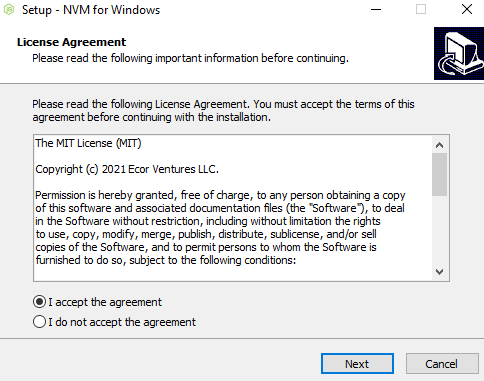
When selected, click on Next

If everything seems good, you can proceed with the installation

Once installation is complete, open Command Prompt or PowerShell with administrative privileges and execute the following command
If you get an error message, please make sure you are running Command Prompt / PowerShell with administrative privileges.
Given that the current version of the node is 17.2.0 you should get an output that looks like the following
“Installation complete.
If you want to use this version, type nvm use 17.2.0”
Copy and paste the command mentioned in the output and click Enter
Let’s make sure everything is working as intended with these two
Setting up React project
Once Node and npm are installed, setting up your React project is as straightforward as it gets. In this tutorial, we will do it by using npx ( Node Package Executor ) and a popular tool called create-react-app which is the official tool used for creating React projects that can be used in production, maintained by React team. Installing process is the same across all operating systems
This will create your React app inside my-app directory
Once finished, from my-app directory you can type a command npm run start to provision React server in the background.
In the browser, you can access it on localhost on port 3000 by default
Setting up Vue.js project
Since we already have Node and NPM installed, our first step is to install the latest stable version of Vue.
This is indeed the recommended method to install it, especially when building large-scale applications with Vue. Keep in mind that using CDN is only recommended for prototyping and learning purposes.
The next option will provide us with the most recent version of Vue. Of course, you can specify an exact version if needed.
It is useful to have CLI commands at your disposal. Setting up hot-reload, lint-on-save and production-ready builds are only a few minutes away with the CLI.
For Vue 3, you should use Vue CLI v4.5, available as @vue/cli. To install it globally, we can use the -g option.
Keep in mind that on Linux and macOS, nvm is the one responsible for setting the PATH variable, so that packages are installed on your user home, and not where the node is installed — somewhere in /usr/local. On Windows, you don’t have to worry about that at all.
And we are all set! Now you can just run this to create a Vue app
Tadaa! You’re officially ready for a Vue-some journey! 🙂
And your beautiful clean project can now be accessed from http://localhost:8080 after running npm run watch
That’s a wrap! Setting up Node and its tools required more work than just installing React and Vue. But that is the whole idea behind Node Package Manager, to help you set up everything you need with ease. We hope that this article helped you set up React and Vue.js! If you wanna check out best practices for React and Vue, or some must-know things about React & TypeScript, check out our previous blog posts!