In this article, we go through the best practice steps for securing WordPress installation from different angles. After we have shown how to set up the operating system environment, installed and configured the services required, and installed the WordPress and HTTPS support, we are now diving into what needs to be done to secure our WordPress box.
ip: 167.71.34.152 (replace it with your server ip)
OS: Ubuntu 23.10 (GNU/Linux 6.5.0-9-generic x86_64)
User: bg-user
Login to the server
MacBook-Pro-ID:~ ivan$ ssh [email protected] -i bluegrid.io-eduPrevent configuration editing via ap-admin
Prevent any editing of the configuration from within the WordPress dashboard by adding the following line to the wp-config.php:
define( 'DISALLOW_FILE_EDIT', true );This line goes into the space for the custom configuration:

This will remove the Theme and Plugin files editor from WordPress menus.
Review WordPress directory permissions
Check your file permissions in the WordPress directory. If you used root privileges to setup file system for the WordPress location you may need to change the permissions to allow Apache service to use it:
- Run:
sudo ls -laF /var/www/html/ - If you see something like this (focus on
root root):
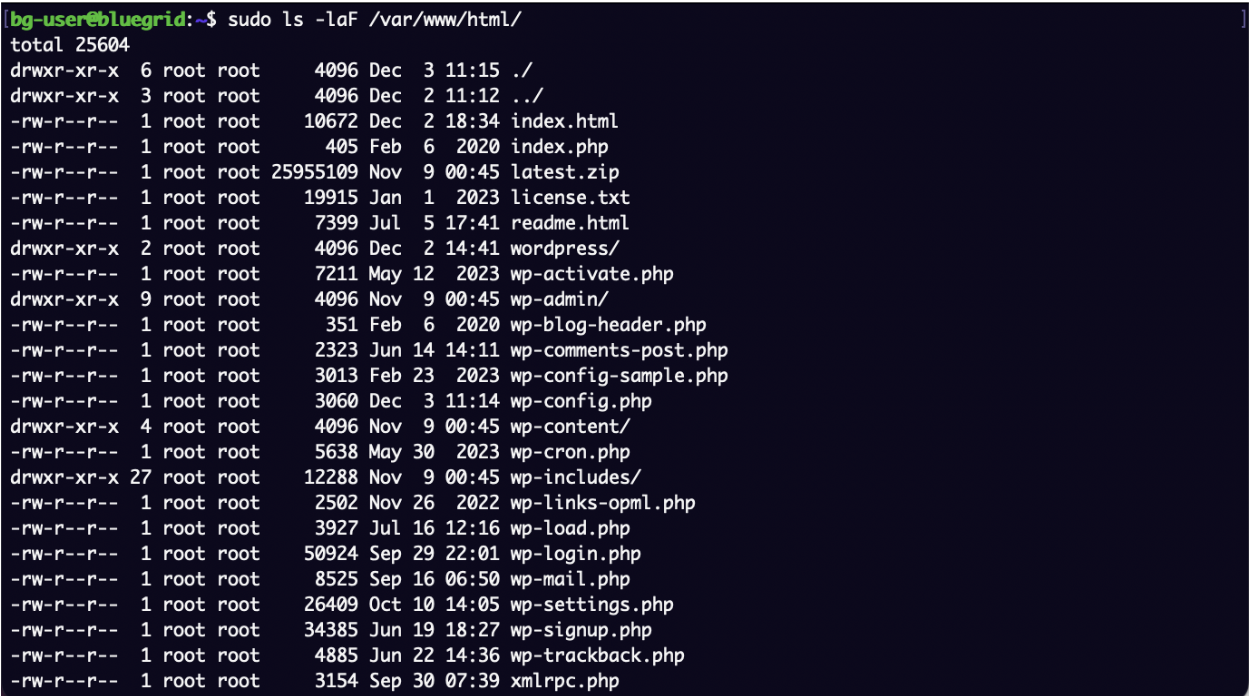
You need to change the user owning the folder. The user should be an Apache user and the best thing to do to be sure what the proper username you are looking for is to check the /etc/passwd file (where all users are listed):
bg-user@bluegrid:~$ sudo ps -aux | grep apacheHere’s my situation:
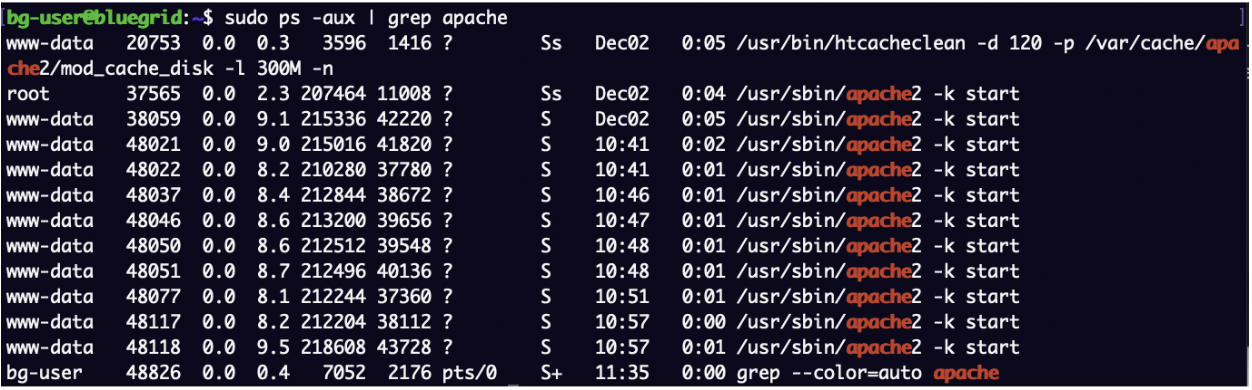
So, the user Apache is running as is “www-data”. Finally, let’s check the group for this user (we need both in order to set proper permissions):
bg-user@bluegrid:~$ groups www-dataIn my case:

Now we can set proper permissions:
bg-user@bluegrid:~$ sudo chown -R www-data:www-data /var/www/html/Confirm the change:
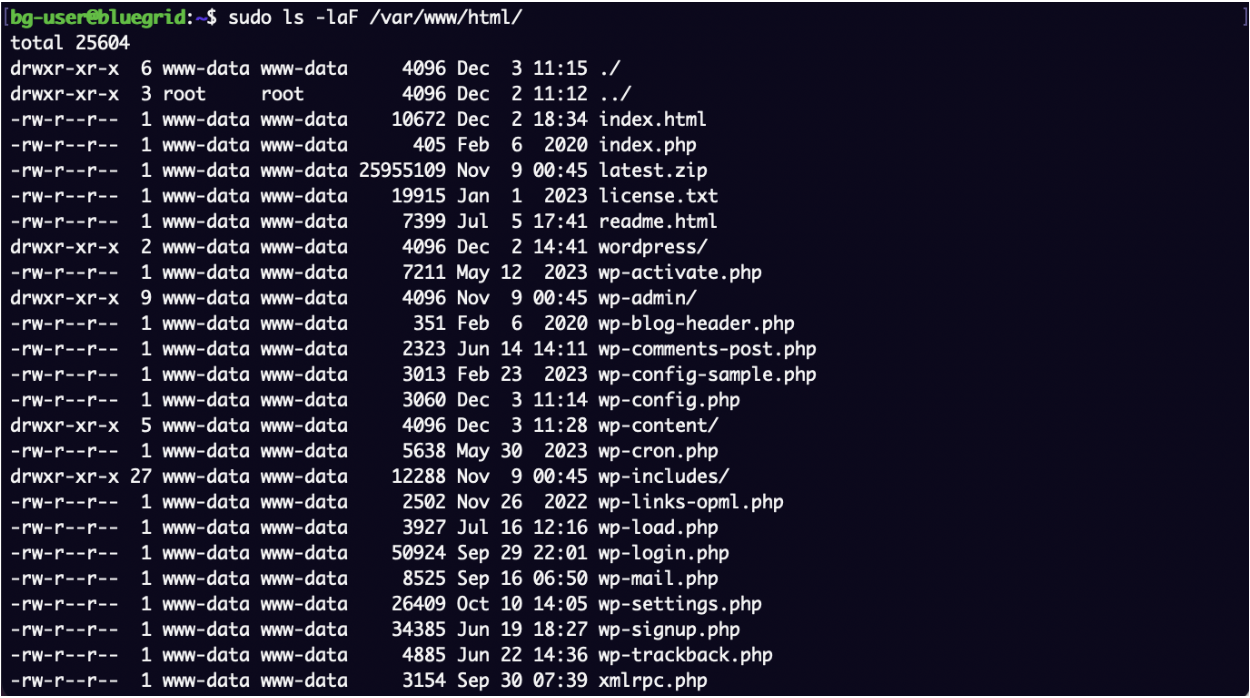
Looks good!
NOTE: The best practice is to keep 755 permissions on folders and 644 on files. To ensure our WordPress installation has proper permissions let’s run these two commands before we continue:
bg-user@bluegrid:~$ sudo find /var/www/html/ -type d -exec chmod 755 {} \;
bg-user@bluegrid:~$ sudo find /var/www/html/ -type f -exec chmod 644 {} \;
Install Firewall
My choice would be Wordfence plugin for WordPress:
Now we’ll go over important settings in Wordfence so you get the maximum out of it (especially if you don’t opt-in for the paid version).
- Enable the auto-update option for Wordfence.
- Login security. Under Wordfence -> Login Security enable 2-Factor-Authentication:
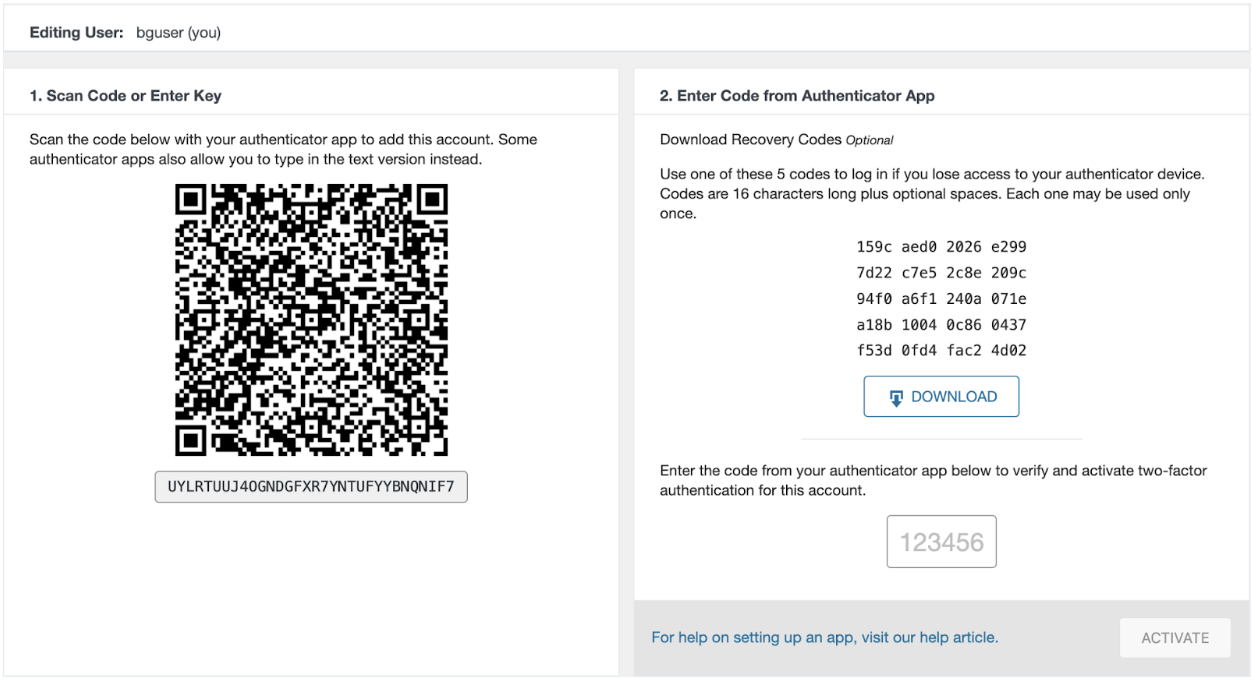
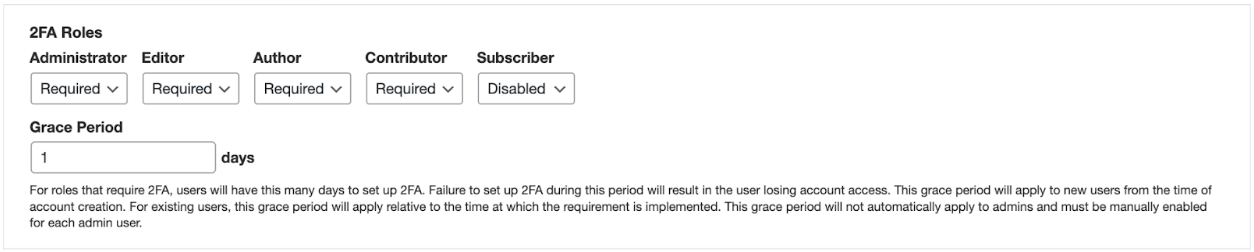
After you enable 2FA you should enforce this policy to all user types you will have on the WordPress dashboard:
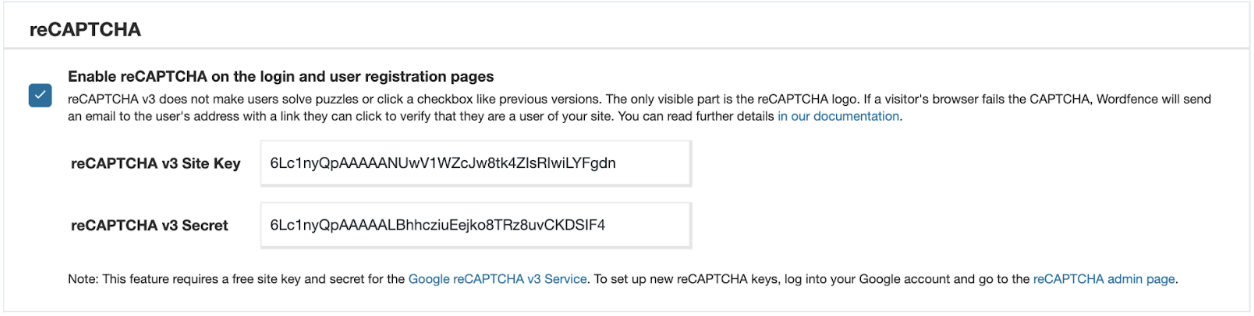
Further, let’s set reCaptcha by following this documentation: https://www.google.com/recaptcha/about/. When you have created keys here https://www.google.com/recaptcha/admin you can copy keys from this window:
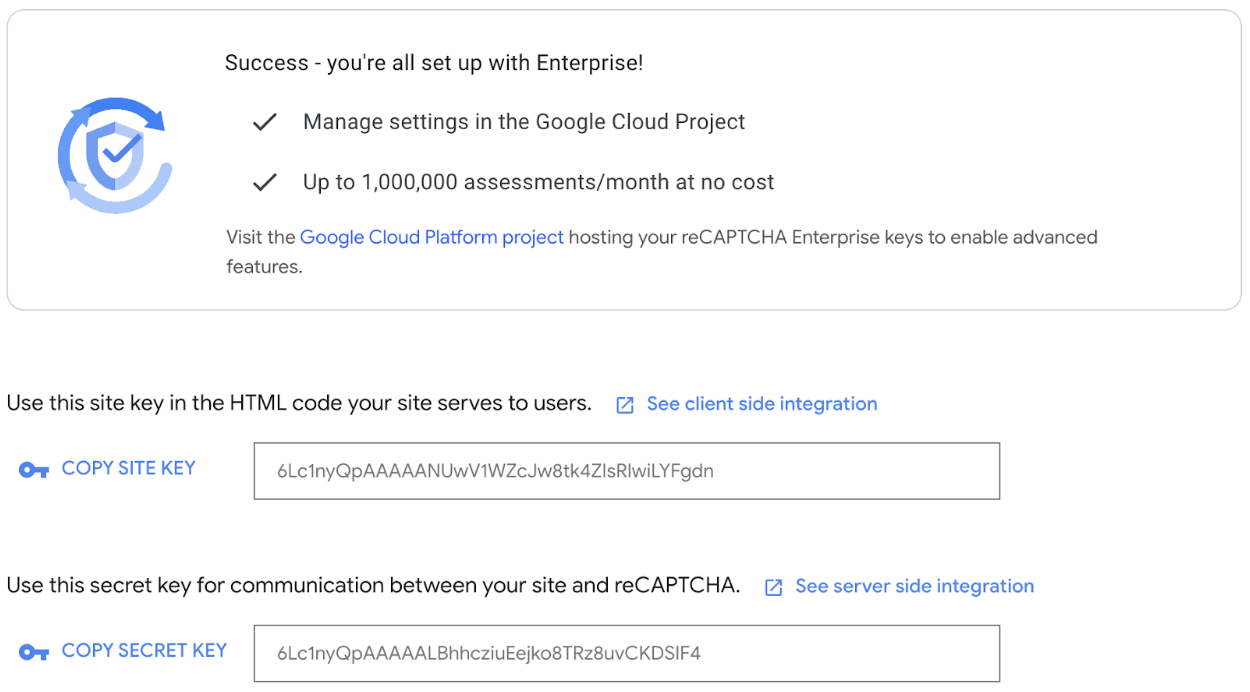
To your Wordfence fields as shown below:
- Brute force – block failed login attempts. Under All Options find Brute Force and make sure that you have the parameters set as per your personal preference. In our case this is the way to go:
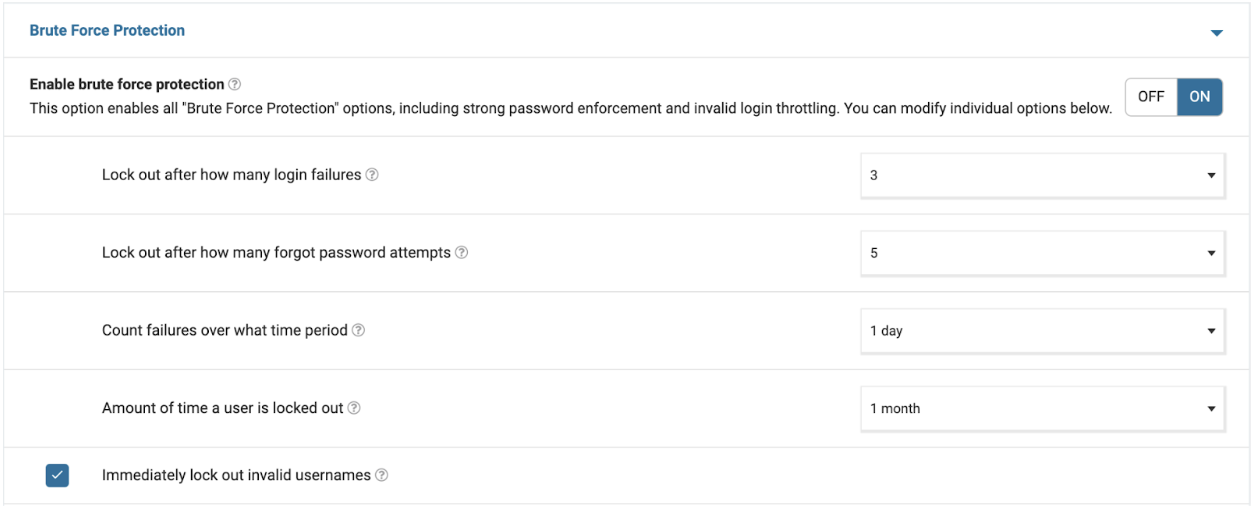
We’ll block the user’s IP after 3 failed attempts, 5 reset password attempts within one day and the block will last for one month.
VPN
If you are not using VPN I recommend going by any of the popular choices when reading this article. I use NordVPN at this time. With a dedicated IP address, you can go ahead and lock access to wp-admin and wp-login.php to this IP only. The way we can do that is either using a firewall (Wordfence, iptables, tcp wrapper, or PHP). I am going to describe all three options here:
Wordfence
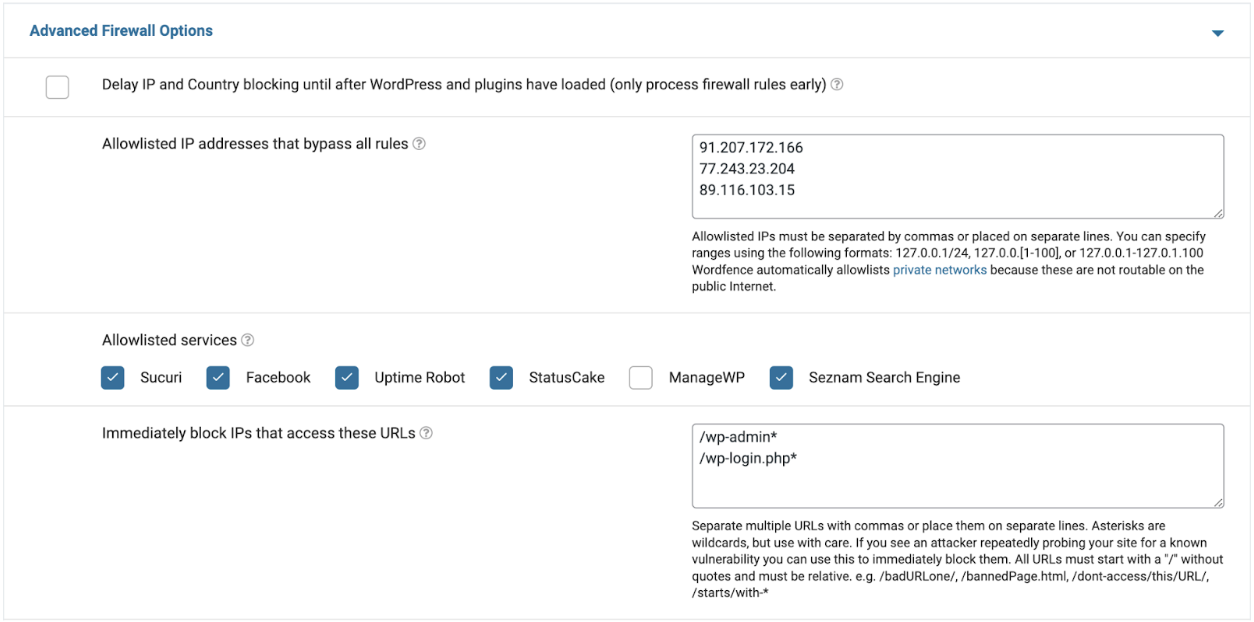
This is the solution with WAF blocking IP addresses attempting to access these URLs, so it’s important to set proper blocking periods based on your personal preferences.
Iptables
Accept traffic from IP 11.12.13.14 (our example IP) to port 22 and connection type TCP:
bg-user@bluegrid:~$ sudo iptables -A INPUT -p tcp --dport 22 --source 11.12.13.14 -j ACCEPTDrop anything else coming to port 22 with connection type TCP:
bg-user@bluegrid:~$ iptables -A INPUT -p tcp --dport 22 -j DROPConfirm the setting:
bg-user@bluegrid:~$ sudo iptables -LTCP Wrapper
We can use files /etc/hosts.allow and /etc/hosts.deny to define the service for which we’ll allow IP address 11.12.13.14 (our example IP) and block all others:
- In the
/etc/hosts.denywe’ll entersshd : ALL - In the
/etc/hosts.allowwe’ll entersshd : 11.12.13.14
sshd : 127.0.0.1
sshd : [::1]
PHP
Open functions.php (located at /var/www/html/wp-content/themes/YOURTHEMENAME/functions.php) file and add the following code (I have commented on it for a better understanding of the code):
function restrict_admin_and_login_access_by_ip() {
    $allowed_ip = '11.12.13.14'; // Set the allowed IP
    $current_ip = $_SERVER['REMOTE_ADDR'];
    // Check if the current request is for the wp-login.php or wp-admin
    $is_wp_login_or_admin = strpos($_SERVER['REQUEST_URI'], 'wp-login.php') !== false || strpos($_SERVER['REQUEST_URI'], 'wp-admin') !== false;
    if ($is_wp_login_or_admin && $current_ip != $allowed_ip) {
        wp_die('Sorry, you are not allowed to access this page.'); // Show a message and terminate the execution
    }
}
add_action('init', 'restrict_admin_and_login_access_by_ip');
Important note: If you have a plugin or other custom code that is invoking admin.ajax for its proper functioning, this code will block it. In order to ensure the functioning of the code we posted above some alterations are needed. Namely, we need to know about the specific type of conflict which is impossible unless we have a specific example in mind.
I had a problem earlier with the plugin Ivory Search where the plugin was used admin.ajax for smart search capability making it incapable of searching through posts as the user types (without hitting ENTER).
The way for us to resolve the problem was by excluding the action name for this specific call by the plugin. The way to identify the action name is by invoking the action that the plugin wants to perform while keeping the inspect tab open and looking for a call made to admin.ajax in the network tab. When we find it, click on it and open the payload section to see details about the body sent along with the request:
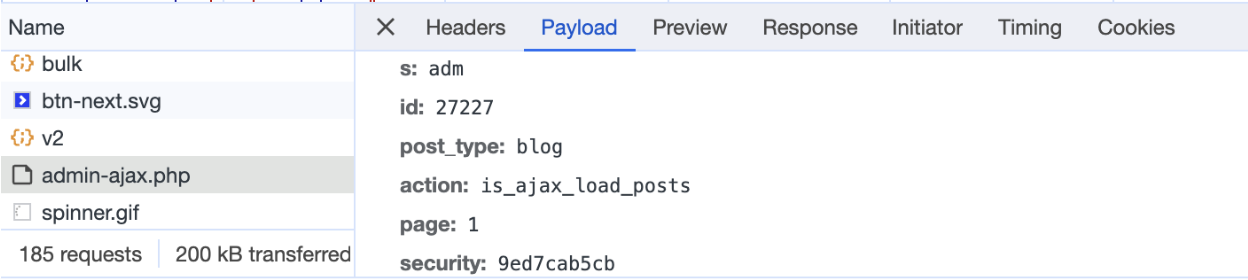
Right there we see action: is_ajax_load_posts which is what we want to allow in the original code by adding this snippet:
if (isset($_POST['action']) && $_POST['action'] == 'is_ajax_load_posts') {
        return;
    }
Making it finally look like this:
function restrict_admin_and_login_access_by_ip() {
	if (isset($_POST['action']) && $_POST['action'] == 'is_ajax_load_posts') {
        return;
    }
    $allowed_ip = '11.12.13.14'; // Set the allowed IP
    $current_ip = $_SERVER['REMOTE_ADDR'];

    // Check if the current request is for the wp-login.php or wp-admin
    $is_wp_login_or_admin = strpos($_SERVER['REQUEST_URI'], 'wp-login.php') !== false || strpos($_SERVER['REQUEST_URI'], 'wp-admin') !== false;

    if ($is_wp_login_or_admin && $current_ip != $allowed_ip) {
        wp_die('Sorry, you are not allowed to access this page.'); // Show a message and terminate the execution
    }
}
add_action('init', 'restrict_admin_and_login_access_by_ip');
Regular backups
If you don’t have the script running on cron to regularly backup your WordPress installation make sure to install one of the plugins. In our case, All in one Migration plugin does wonders:
As this plugin requires a paid license to set up a schedule, you may want to consider one of the other options (there are plenty) and set daily, weekly, and monthly backup schedules.
- Hide the WordPress version. A lot of breaches start with exploring the WordPress version so that the attacker can deploy adequate techniques to exploit active vulnerabilities.
- Add this code snippet to the
functions.phpfile:
remove_action('wp_head', 'wp_generator')
function remove_version_info() {
return '';
}
add_filter('the_generator', 'remove_version_info');