In this article, we are performing the final touches on installing the WordPress website – Installing HTTPS support for WordPress instance. We have already set up operating system environment, installed and configured all the required services on the server, and installed the WordPress instance.
ip: 167.71.34.152 (replace it with your server ip)
OS: Ubuntu 23.10 (GNU/Linux 6.5.0-9-generic x86_64)
User: bg-user
Login to the server
MacBook-Pro-ID:~ ivan$ ssh [email protected] -i bluegrid.io-eduThere are several ways to obtain the HTTPS certificate, and I’ll cover the fastest one so we can ensure the security of the HTTP traffic on the website – letsencrypt.
Install certbot:
bg-user@bluegrid:~$ sudo apt install certbot python3-certbot-apacheSince the SSL is installed for the specific domain we will perform this howto assuming we have a domain bluedomain.com and www.bluedomain.com.
The first step is to add this domain into the vhost file /etc/apache2/sites-enabled/000-default.conf:
ServerName bluegrid.xyz
ServerAlias www.bluegrid.xyz
Restart Apache service:
bg-user@bluegrid:~$ sudo service apache2 restartInitiate the certbot certificates obtain process:
bg-user@bluegrid:~$ sudo certbot --apacheNote: make sure that your domain is pointed to your server IP address! When the process is over the success looks like this:

Notes:
- Certbot created SSL config file
/etc/apache2/sites-available/000-default-le-ssl.conffor both domains.
To confirm that the installation is a success you can run a simple curl command against both domains: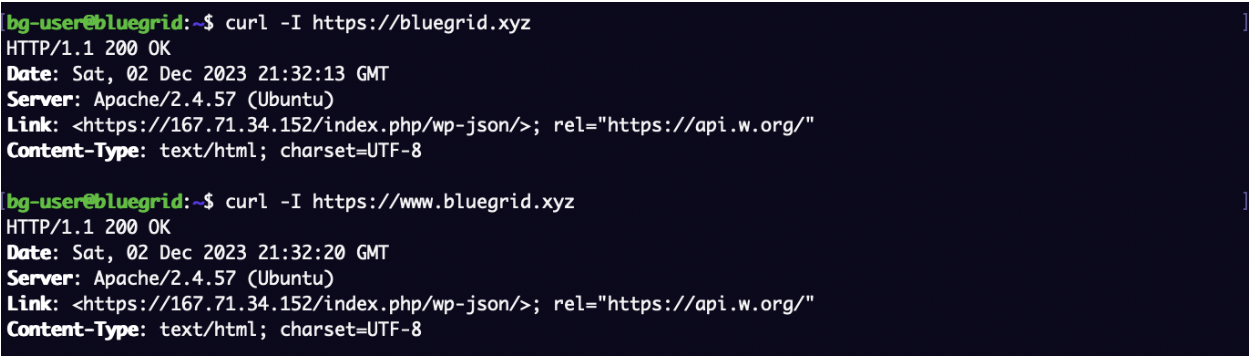
- Now you must add a domain to your WordPress settings:

Finally
The website is now operational and can be used. However, to prevent malicious actions and unauthorized intrusions we need to make sure that WordPress installation is secure.


