Pre-requirement for this post is for the ProcessMaker up and ready to go, in our case running locally dockerized on http://localhost:8080/ as explained in our “Getting started with ProcessMaker” post. Like in the “Getting started” post, we are providing the necessary knowledge to use the ProcessMaker automatization tool and in this article, we’ll show you how to create a simple ProcessMaker process.

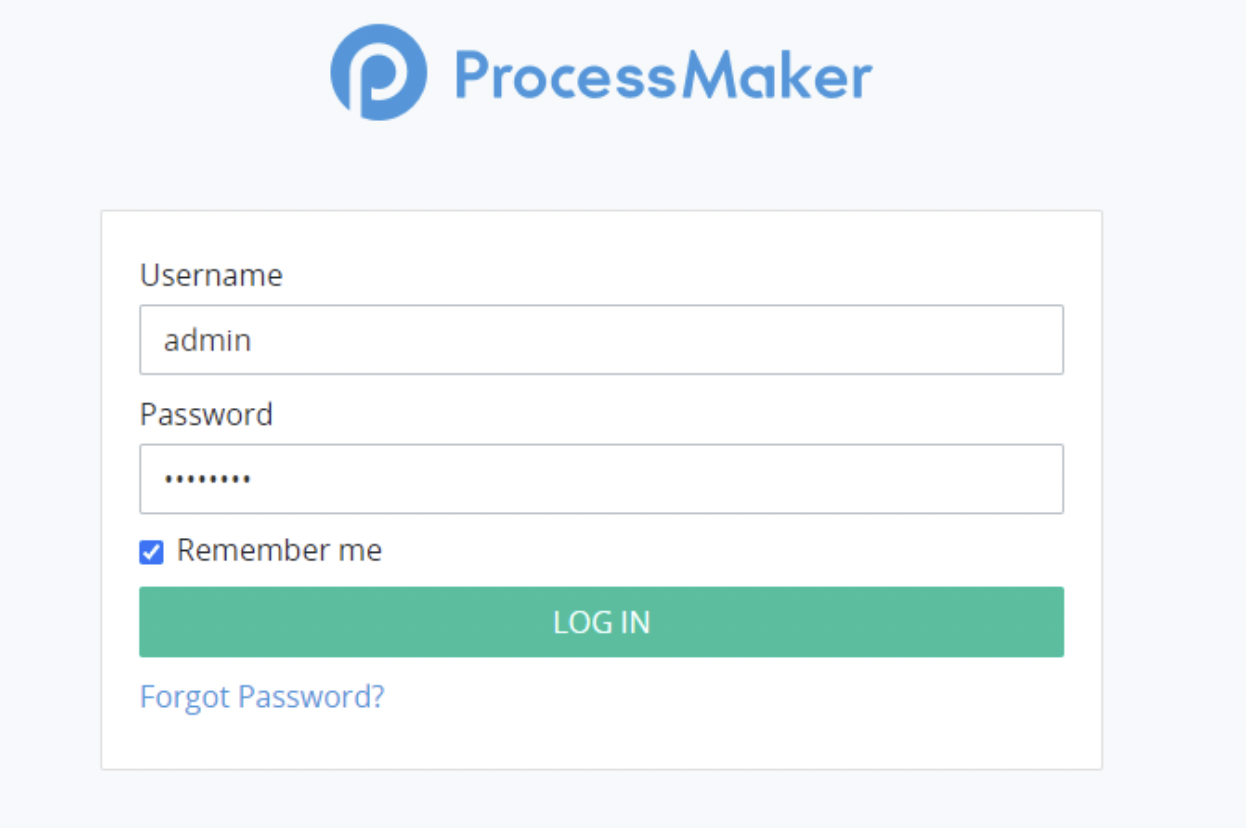
We first need to authenticate ourselves by going to http://localhost:8080/login and entering our credentials (default password: admin123):
After logging in and arriving at our dashboard we go to the “Designer” menu option and then click on the button on the right side of the screen in order to create our new Process:

We give it a name and a basic description and click “Save”. That will create a blank process for us and lead us to the page where we can edit it.
In this editor using the drag and drop node system, we can easily create and visualize solutions that help us in any of our automating needs.

We will create the simplest Process possible which will be used to process requests coming from people submitting data to our endpoint through a ProcessMaker “Screen” object, which will in this case just be a regular form.
Start out by dragging these three elements from the left panel: “Start Event”, “End Event” and then “Task”.
When you drag out the “Task” element you will be prompted to pick its type, select the “Form Task”.
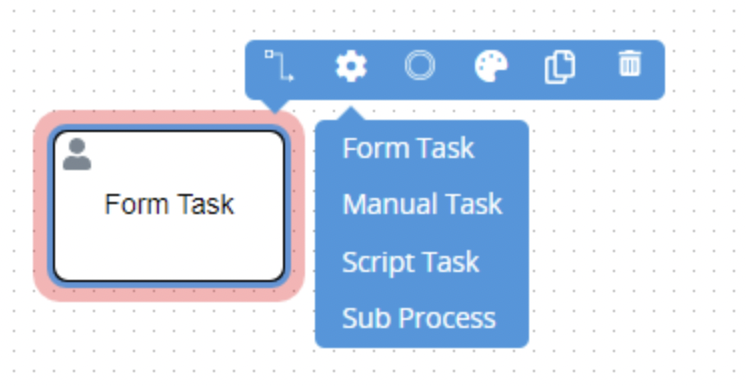
Use the first icon in the menu in the picture above to also connect these three elements together.
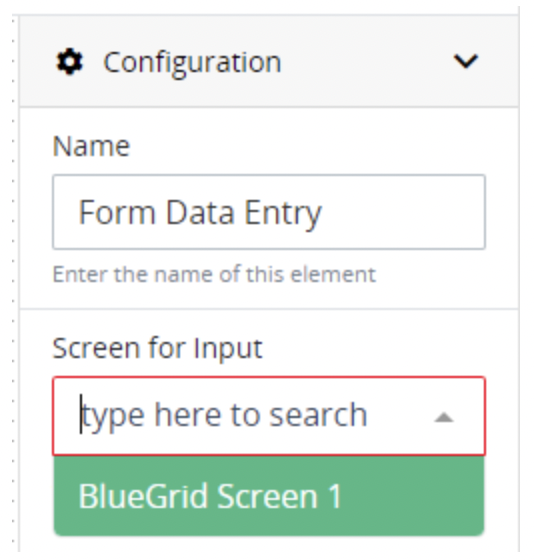
Now when we select that task element we should look to the right in its “Configuration” window and select which already created form are we going to use as a template for this task by changing the value of the “Screen for input” field:
In case you don’t already have a form created you can do so by following this guide <link to form creation post>.
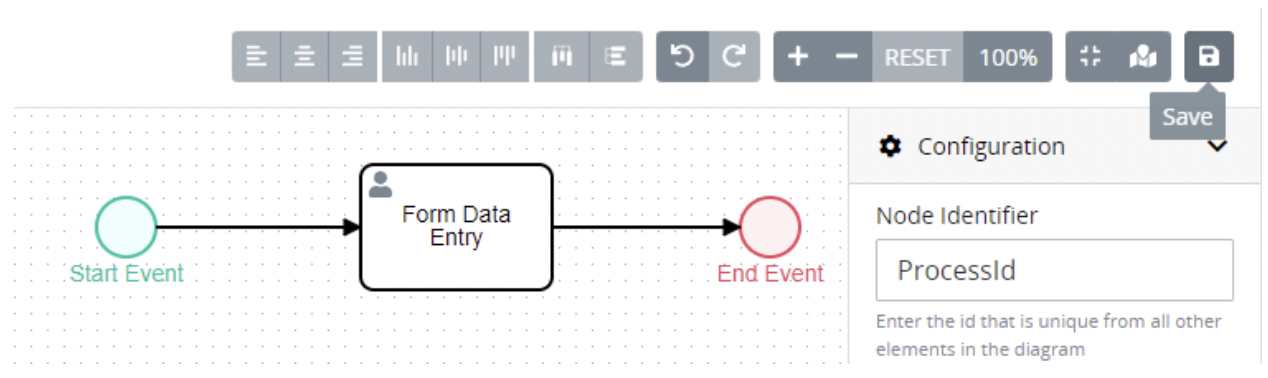
Now at the end we need to save our simple graph by clicking the icon at the top right corner:
And we’re done!
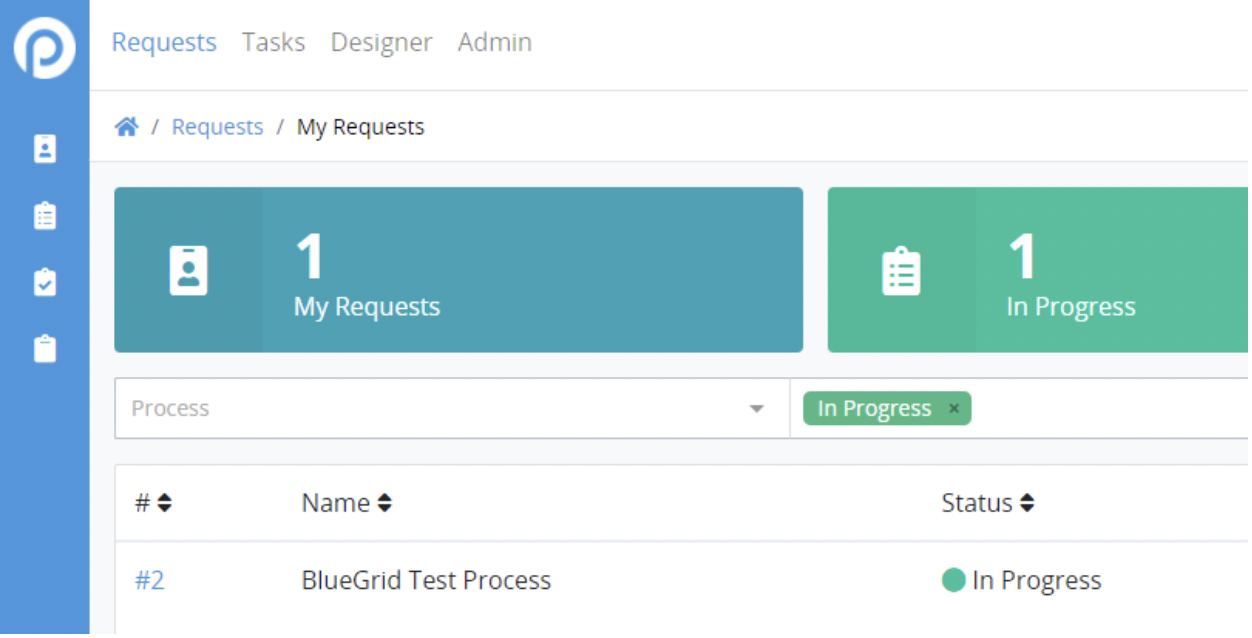
Now with this simple example when we get any incoming input data we will see it on our “Requests” page: