Installing WordPress is super easy. This article will cover how to install WordPress using cPanel and locally if you need to practice.
WordPress is the most widely used website builder on the planet. Over 42% of all websites on the internet are powered by it. One of the reasons is that WordPress is simple to set up and operate, making it simple for anyone to create a website.
With just a few clicks, you can install WordPress on any of the best WordPress web hosting companies. Installing WordPress is usually a quick and painless procedure that takes less than five minutes.
But, a lot of hosting companies are using cPanel software to manage websites, so in this article, we will focus on how to install WordPress on cPanel, and locally, so you can practice.
How to install WordPress on cPanel
cPanel is web hosting control panel software. It gives the website owner or “end-user” a graphical interface and automated tools to make the process of hosting a website easier. It has a three-tier structure that allows management via a typical web browser.
Depends on the hosting companies, but most of them offer installation of WordPress using Softaculous. With Softaculous you can easily set up WordPress.
Follow these steps to install WordPress using Softaculous:
Step #1
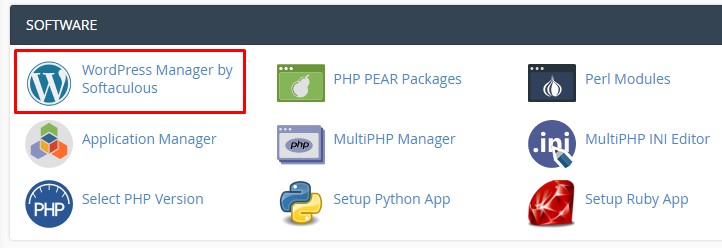
Once you are logged in to the cPanel, under SOFTWARE find WordPress Manager by Softaculous. Click on it.
Step #2
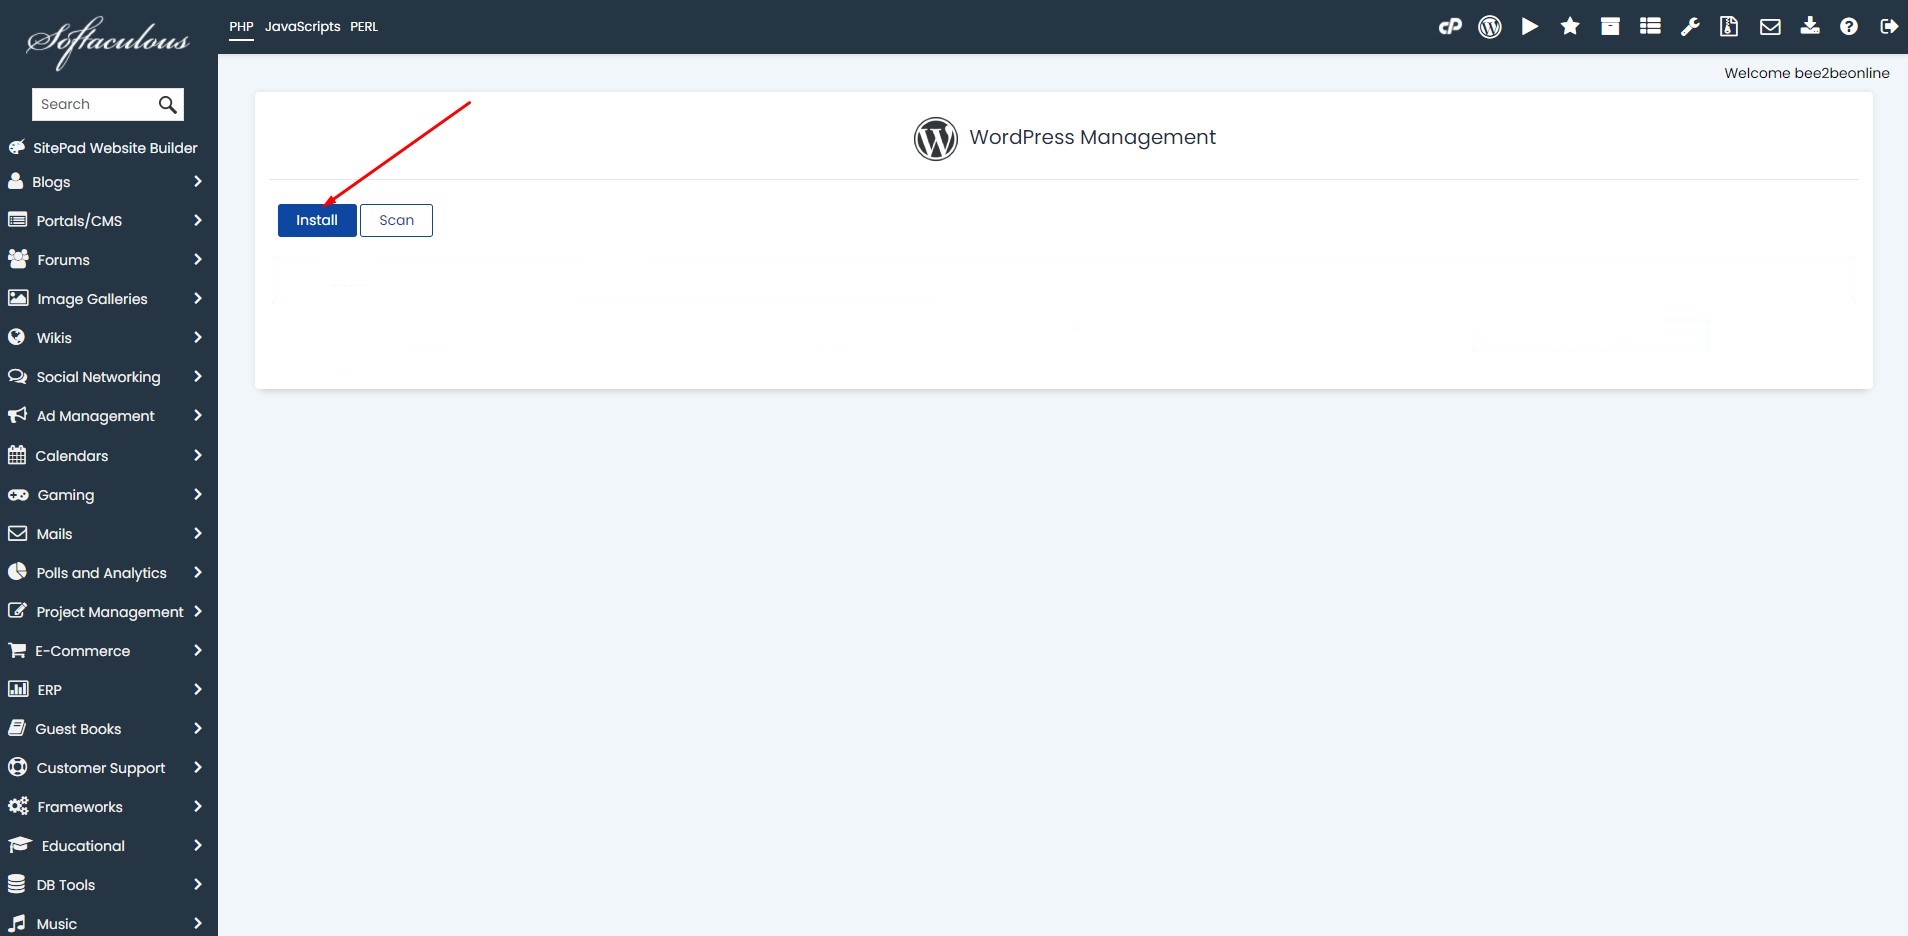
After you click on it, you will be redirected to the Softaculous panel from which you can manage WordPress websites installed on the cPanel.
Click on the install button.
Step #3
After you click the button install, the new window will open where you can fill out the required information.
Choose a Domain and proceed to the next step.

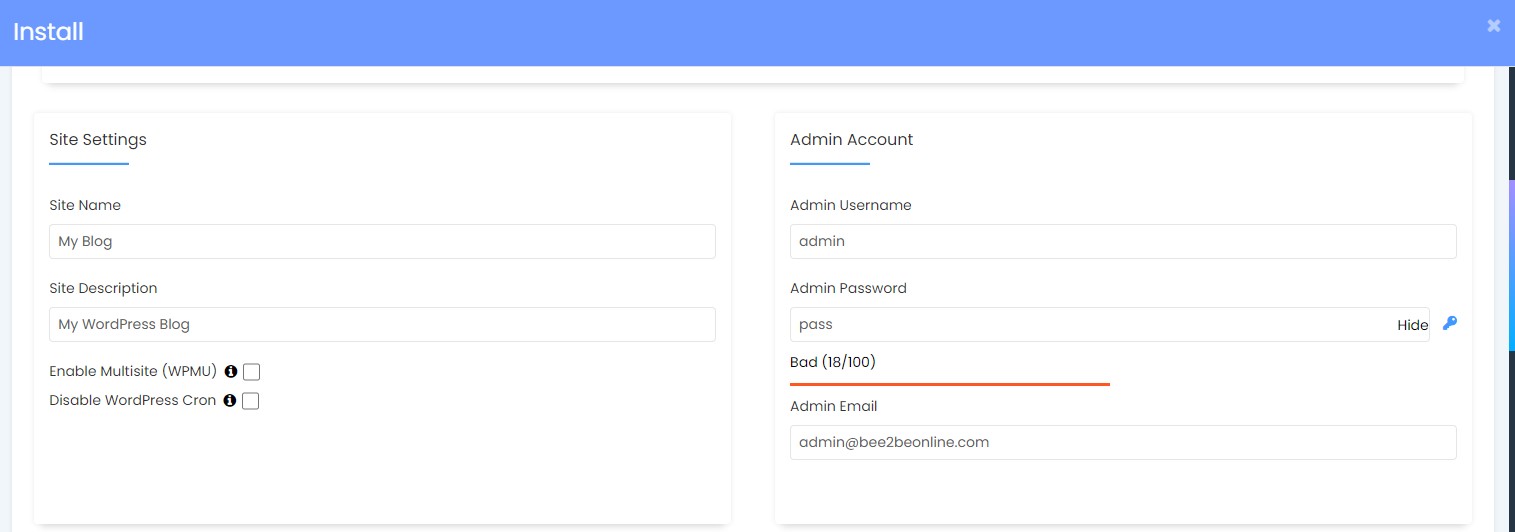
Now you should give your website a name and description. Also, you need to set up a username and password for your WordPress website.
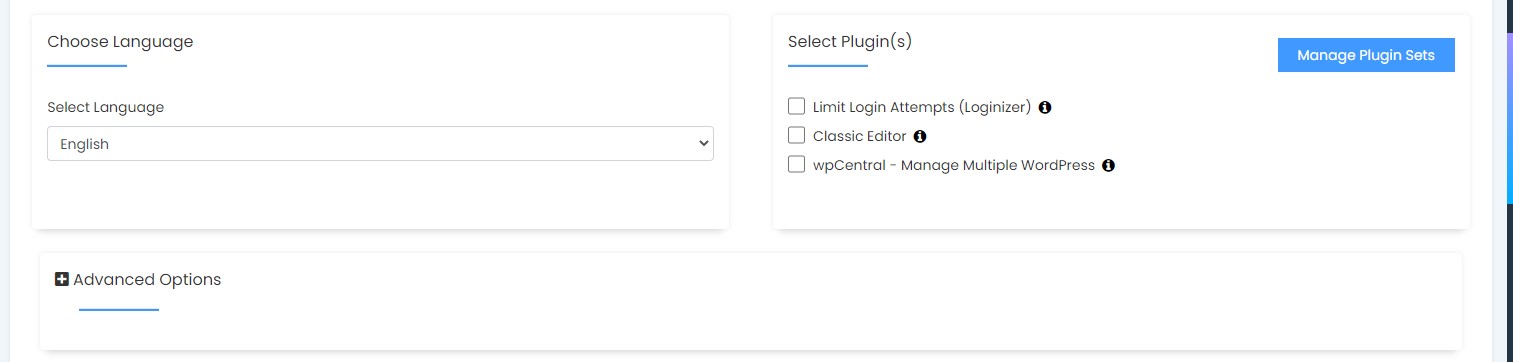
In this section, you can set website language, and even add plugins. But, note that you can do that even after you install WordPress.
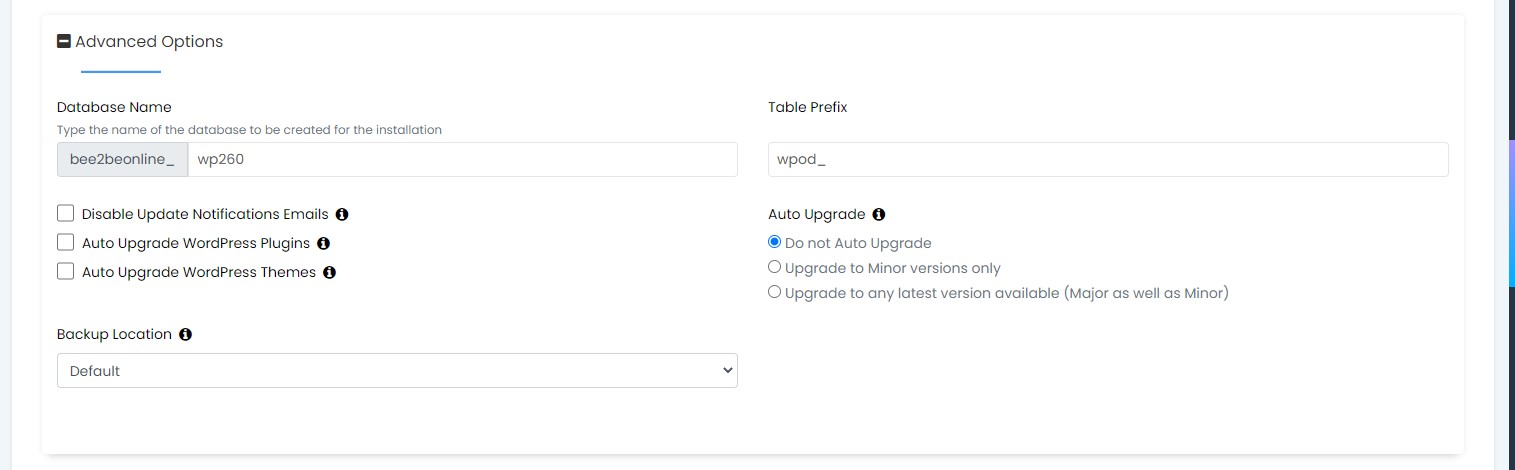
You can leave Advanced Options as it was, by default.
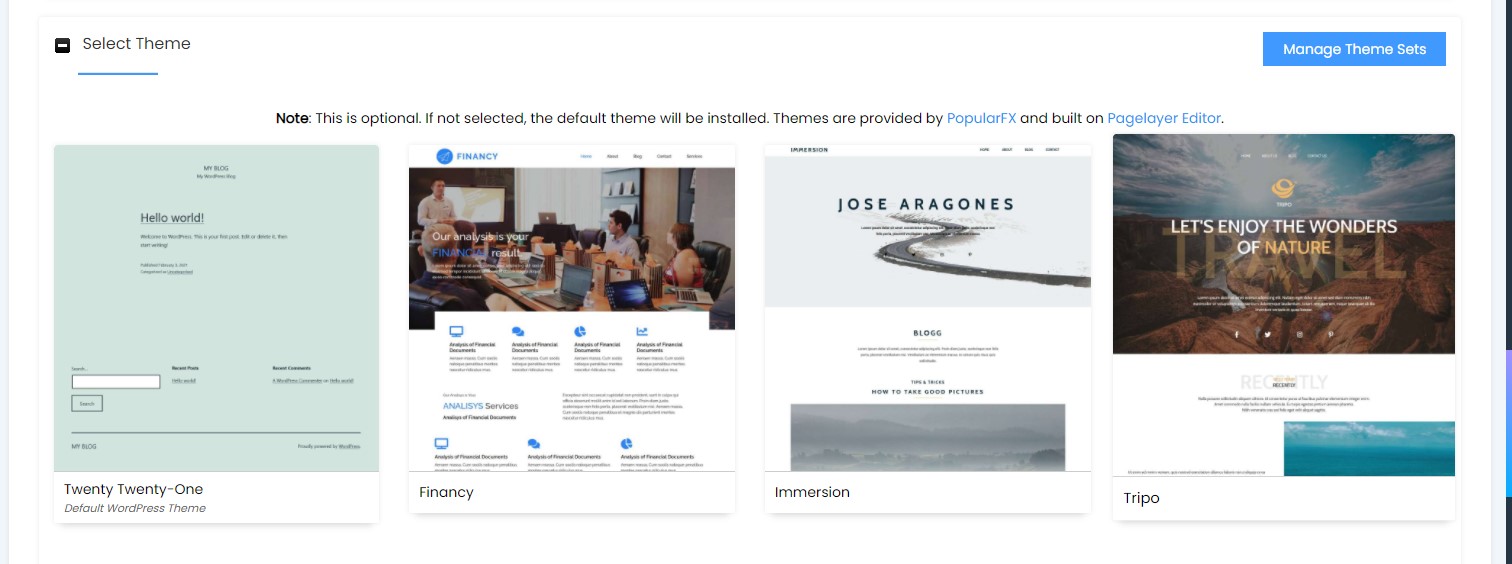
In this section, you can select a Theme, but if you want to add a theme that you can not find here, you can still do it when you install WordPress.
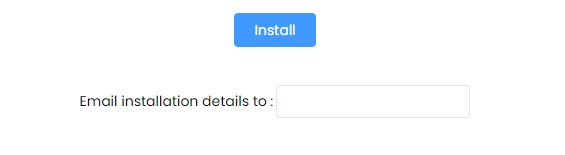
In the end, you need to add your Email address and press Install.
Once you press Install, it will take only a few minutes for Softaculous to install WordPress on your website.
After the installation, you can simply log in to your WordPress dashboard by clicking on the Login button.

That is how you install WordPress with ease using Softaculous in the cPanel.
If your hosting provider doesn’t provide you with the software from which you can install WordPress with a few clicks, there is another way.
Installing WordPress manually on cPanel:
Step #1
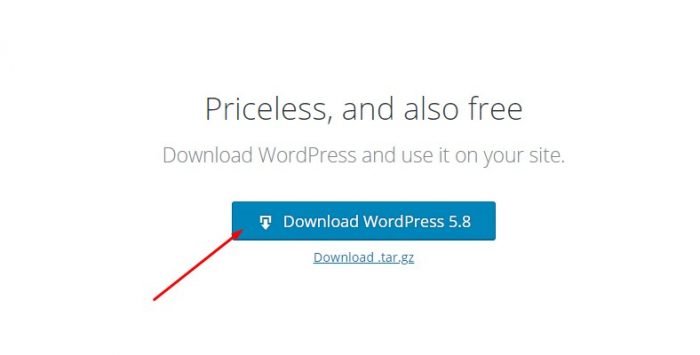
First, you will need to download WordPress. You can easily do that by going to WordPress.org and click on the Get WordPress button.
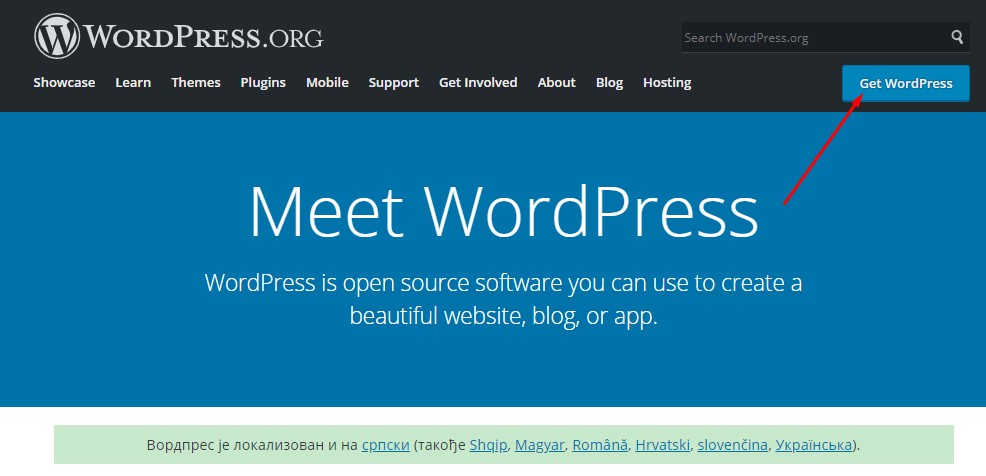
Pressing the Get WordPress button will lead you to the new page, from which you can download the WordPress. Scroll a little bit, and you will find the Download WordPress button with the latest version.

Step #2
After you download the WordPress .zip file, you will need to upload it to the cPanel.
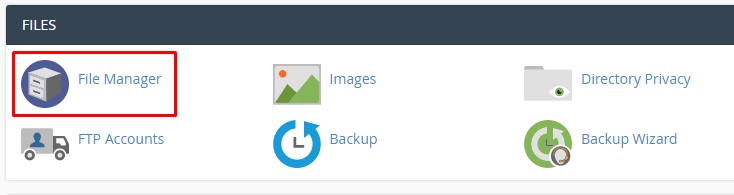
Once you are logged in to the cPanel, under FILES find Files Manager. Click on it.
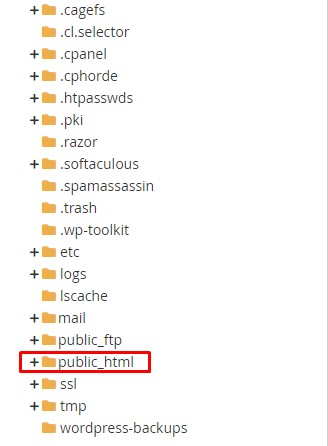
After you click on it, you will be redirected to the new window from where you manage files for your website. Find the folder public_html and click on it.
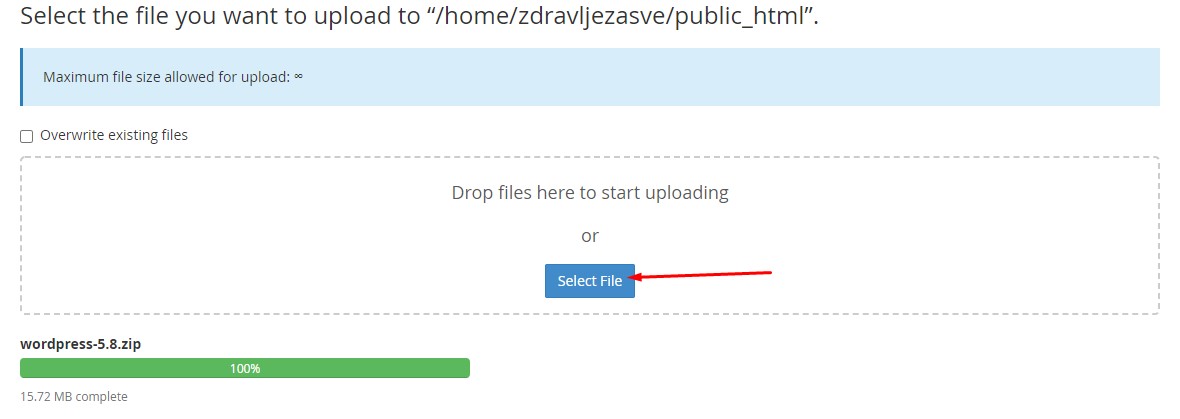
Once you expand that folder, in the upper navigation bar you can find the Upload button, from where you will upload the WordPress .zip file.
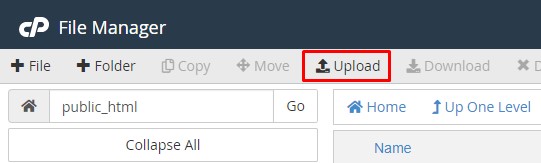
Clicking the Upload button will open a new tab where you will upload files. Press the Select File button and upload the downloaded .zip file with WordPress. Once the process is completed, return to the public_html folder.
After you have successfully uploaded the file, you will need to extract it. Press right-click on the .zip file and select Extract.
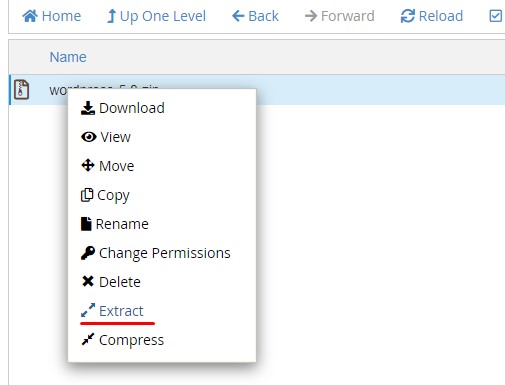
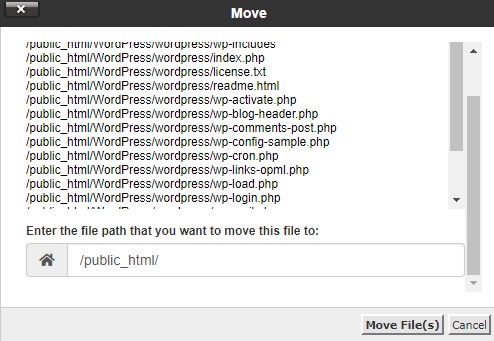
You will have to extract it to the public_html folder, so it will be linked to your domain name.
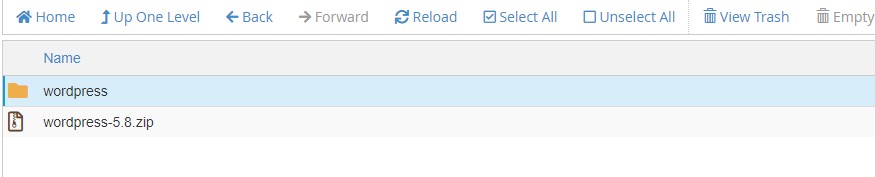
After you click extract, it will extract the whole WordPress folder. Open wordpress folder selected on the image above. Inside the folder, you will find all the files for WordPress.
Select all of the files and folders, by simply clicking on the Select All.

Now you will have to move those files and folders outside the wordpress folder.
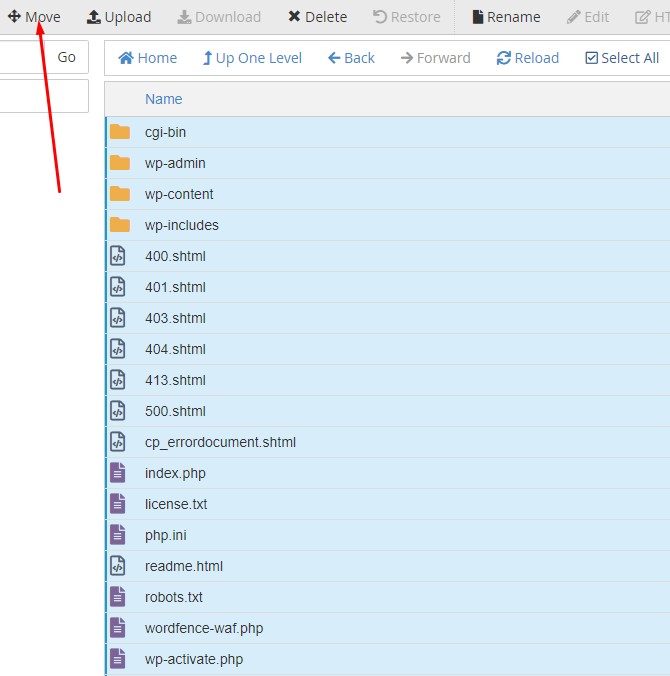
Move files and folders to the public_html folder.
Step #3
After you moved the files, you are ready to install WordPress on your website. To continue to the installation you can simply type your domain name /wp-admin. It will lead you to the installation process, from which you can install WordPress with ease.

Setting up your Local Environment with XAMPP
First, you will need to create a local development environment, which will act as a server on which you will develop and manage a local WordPress website.
For setting up our local environment we will use XAMPP. Go to their website and download the version preferred for your operating system. In this tutorial, we will be using XAMPP for Windows:

After you download it, install it (fill out all of the checkboxes):

Open the XAMPP Control Panel, and press START for modules Apache and MySQL as shown in the image below:

Modules Apache and MySQL should have a green background, which means that they are running.

Alright, our local development environment is set up. We can proceed to the next step.
Install WordPress
Create an empty folder for your WordPress website
Since we are using XAMPP, you will need to create an empty folder for your WordPress website inside htdocs folder.
Find the xampp folder that you have previously installed it > open it > find htdocs folder > open it > create an empty folder for your WordPress website, for our example we will create a test-website folder. That’s it for now. Download WordPress.
Now we need to download the latest version of WordPress. Once you are on the download page, download the WordPress files by clicking on the blue button Download WordPress as shown in the image below:
Extract WordPress files
Extract WordPress files into the folder you have created in xampp/htdocs. In our example it is xampp/htodcs/test-website.
Once you have done that your folder should have a folder named wordpress, and inside the wordpress folder, there should be all the files and folders required for WordPress to run, as shown in the image below:

Select all those files and folders, and cut them (ctrl + x) > go back and paste them inside your wordpress website folder (in our case it is test-website folder).
After you have done that, you can proceed to delete the empty wordpress folder, and keep the rest.

Great! That part is finished.
Creating a database
Open your preferred browser and in the URL section type – http://localhost/dashboard/ . That will lead you to the XAMPP dashboard from where we will create the database.
Once you are there, go to phpMyAdmin, as shown in the image below:

Pressing the phpMyAdmin button will open a new window from where you can create your database.
Click New:

Give your database a name (Step #1) and from the dropdown menu select Collation (Step #2). After that press Create (Step #3):

That’s it, we created a database! You can close it.
Tips: Write down all of the information above inside the text file.
Configuring the WordPress
Open your preferred browser and in the URL section type – http://localhost/ + your website folder name. In our case it is test-website, so the full URL is – http://localhost/test-website/
Now we can start configuring our WordPress website. Chose a preferred language and press Continue:


Fill out all of the required fields:
Database Name – it is the one we created before – http://localhost/phpmyadmin/. In our case it is testwebsite_db,
Username – it should be root,
Password – it should be blank,
Database Host – leave it as localhost,
Table prefix – leave it as wp_
When you are done, press the Submit button.


Fill out all of the required fields:
Site Title – this is the name of your Website,
Username – this username will be used when you need to login into your WordPress website,
Password – this password will be used when you need to login into your WordPress website,
Your Email – it is a required field,
Search engine visibility – since we are creating a website in the local environment, we will check this field.
When you are done, press the Install WordPress button.

Tips: Write down all of the information above inside the text file.
This is the message you need to see:

If you followed all of the steps, you should be seeing WordPress Dashboard:

Excellent! You have successfully installed WordPress! ☺
When you visit your main URL you will see the default WordPress post – “Hello World!”